Showing posts with label main courses. Show all posts

Tuesday, 19 November 2024

Recipe Tuesday: Hoisin Chicken Tray Bake


Sometimes, you just need comfort food: something easy, warming, filling and tasty.  This is one of those dishes.  I don’t remember how I discovered the recipe.  It may have popped up in my FB feed, in an ad for the Australian magazine “New Idea”.  Certainly, they’re the source of the original recipe, although I can no longer find it on their website.

This is my variation.  The original recipe did not have added vegetables or mixed grains, nor did it use whole chicken legs.  It used thighs, which are fine but a whole leg is more tasty, more sustainable AND gives you more bones for the stockpot later.  I’ve given quantities for both.  Our butcher charges £3.99/kg for legs, so approximately £1 each.

Ingredients

4 whole chicken legs (or 4 large thighs, or 8 supermarket thighs)
1 heaped teaspoon Chinese 5 Spice
1 cup basmati rice and 1 cup bulgar wheat (or 2 cups of either)
1 cup frozen peas
1 cup frozen sweetcorn
4 cups chicken stock (ie. 1 litre chicken stock)
4 tablespoons hoisin sauce (aka 1/4 cup measure)
1/2 cup peanut butter
2 tablespoons soy sauce
2 cloves garlic, crushed
2 teaspoons fresh ginger paste (or 1 inch grated fresh ginger)
1 large or 2 small sweet potatoes, cut into 1-2 inch chunks

Method

  1. Preheat the oven to 180C.
  2. Season the skin-side of chicken with salt and pepper. Sprinkle with five spice.
  3. Heat oil in a large, flameproof, roasting pan or stew pot over a medium to high heat. Add chicken, skin-side down. Cook for about 5 to 6 minutes, or until golden brown. Remove chicken.
  4. Meanwhile, combine stock, sauces, peanut butter, garlic and ginger in a large jug. Mix well.  (See note below)
  5. Add stock mixture and rice to same, hot pan. Stir through the frozen peas and sweetcorn.  Bury the sweet potato chunks around the pan, under the rice.  Arrange chicken over rice. Bring to boil. Remove pan from heat. Put on the lid or cover tightly with foil.
  6. Cook in a moderate oven (180C) for about 40 minutes, or until rice is tender and chicken is cooked through. Remove pan. Stand, covered, for 5 minutes, or until liquid is absorbed.

Notes:
  • There will be leftovers!  There will certainly be enough rice for a stir fry, later in the week.  If you don’t want that, halve the quantities of rice, bulgar wheat and stock.
  • The bulgar wheat adds additional protein and fibre.  (It has 8 times the protein and 4 times the fibre of brown rice.)
  • You can use either crunchy or smooth peanut butter.
  • Nobody has a large enough jug for step 4.  Mix everything that you can with enough stock to fill the jug, and add the remainder of the stock later, at step 5.

- Pam 


Tuesday, 10 September 2024

Recipe Tuesday - Baked Feta & Tomato Pasta

There is nothing like the taste of a freshly ripened, home grown, cherry tomato.   This year, we’re having a bumper harvest of them.  Fortuitously, someone mentioned an internet craze for baked feta and tomato pasta.  After a couple of sessions testing other people’s recipes, this is my version.  It feeds 4.

Ingredients

500g punnet of Cherry Tomatoes (or the largest you can get), washed
200g block Feta Cheese (get the proper Greek stuff, made with sheep/goat milk)
2 cloves garlic, crushed
80g jar salted anchovies in olive oil (or use a tin.  Don’t drain it.)
1/3 cup extra virgin olive oil (the good stuff)
360g dried pasta


Method

  1. Preheat the oven to 220C.
  2. Put the Feta into a lasagne dish, arrange the cherry tomatoes around it, together with the garlic.  Pour over the olive oil, attempting to coat as many of the cherry tomatoes as possible.
  3. Turn the Feta over, twice, to coat with olive oil.
  4. Dot the anchovies around the dish and pour the jar’s oil over the contents of the dish.


  5. Bake at 220C for 45 minutes.
  6. Meanwhile, at the 30 minute mark, boil a large kettle or two of water, pour it into your largest saucepan and bring the water back to the boil..  Add a pinch of salt, then pour in the dried pasta.  Bring back to the boil again, turn down and simmer for the amount of time specified on the packet.  (In my case, 11 minutes.). Once cooked, drain and return the pasta to the saucepan.
  7. After 45 minutes in the oven, the tomatoes should be cooked and the Feta browned.

     
  8. Remove the lasagna dish from the oven, and mash the contents together.  Stir into the drained pasta and serve.
It isn’t pretty but, OMG, is it tasty!


- Pam

Tuesday, 2 June 2020

Carrot and Hazelnut Roast

Something for our continued series of Using Up Carrots.  Following on from the Carrot & Lentil Soup I made last month, one of the dishes I  planned to make with our mutants was the Carrot & Hazelnut Roast from Rose Elliott’s Cheap and Easy vegetarian cookbook.  Sadly, Lidl aren’t stocking hazelnuts, so I tried it with cashews and, you know what? It tastes even better.  This recipe doubles up well and copes if you need to vary the size/number of carrots or can’t get a large enough packet of nuts.  Serve with roast potatoes and peas or, in hot weather like today, cold with a green salad.  It’s delicious either way.

Price-wise, this should work out at less than £2 for one loaf.

Carrot & Nut Roast - serves 4

Ingredients
2 large carrots, sliced
1 onion, peeled and roughly chopped
2-3 slices bread, torn into strips
100g-200g hazelnuts or Cashew Nuts
2 teaspooons mixed herbs
2 eggs
1 tablespoon soy sauce

Method
  1. Preheat the oven to 180C.
  2. Place the hazelnuts, carrots, onion and bread into the food processor, hold it securely and process until chopped.  (It’ll bounce around a bit.) 
  3. Add the remaining ingredients and process until combined.  You want a grainy texture, not completely smooth.
  4. Spoon into a lined loaf pan and bake for 50-60 minutes, or until the middle feels firm to touch and it is browned on top.  
  5. Turn out of the pan, peel off the lining and cut into 4 to serve.

Note:  If you’re making roast potatoes to accompany this, parboil them for 15 minutes, baste with oil and put them in the oven at the same time as the roast.


Enjoy!

Pam

Tuesday, 19 May 2020

Recipe Tuesday: Corn Pone (or what to do with leftover chilli)

Sunday, we had beef chilli for dinner.  When I cooked it, I followed the chilli variant of my recipe post from May 2007,  Minced Beef & Other Possibilities, adding grated carrots and a quarter cup of split red lentils to ensure we had leftovers.  There was enough chilli for dinner for two, two lunch boxes and to form the basis of dinner tonight.  

The idea behind this recipe comes from The Tightwad Gazette, where Amy Dacycyn talks about adding a tin of baked beans and a cornbread top to leftover chilli, in order to make Corn Pone.  Sadly, Amy doesn’t give more details. Maybe Americans are taught to make cornbread at school.  I certainly wasn’t.  The top is a Cornmeal Spoon Bread.  I haven’t priced up the leftover chilli but the additions come to 62p.

Corn Pone - Serves 4

Ingredients

2-4 portions of beef chilli
1x 420g can baked beans (22p)
150g/1 cup fine cornmeal (15p)
1 teaspoon baking powder (5p)
1 clove garlic, crushed (optional) (5p)
1 teaspoon lazy chilli (optional) (5p)
1 egg, beaten (10p)
250ml/1 cup water
Pinch of salt
5 grounds black pepper

Method
  1. Preheat the oven to 220C.
  2. Combine the chilli and the baked beans and pour into a deep ovenproof dish.  Smooth over the top.
  3. In a bowl, combine the other ingredients and beat until smooth.  (This is the spoon bread top.)
  4. Pour the spoon bread over the over the chilli, carefully covering the top of the chilli.  (It will be runny and won’t pour out smoothly.)
  5. Bake in the preheated oven for 30-40 minutes, or until browned and crisp on top.

Try as I might, I couldn’t get it to look pretty on the plate, but it was yummy!


Enjoy.

- Pam

Thursday, 30 April 2020

Carrot & Red Lentil Soup

Last year, we grew a small bed of carrots.  Beyond unearthing a couple, which were decidedly green  - the green bits are safe to eat but taste like eating carrot tops - we didn’t get around to unearthing more until earlier this month.  OMG, I have never seen so many deformed carrots!


They’re multi-coloured, which surprised us, until we found the label.  Turned out that we planted a rainbow packet of purple, yellow and white carrots as well as the traditional orange.   How anybody grows straight carrots is beyond me.  These were planted in a new, raised bed, which was filled with fresh compost, and they still turned out looking like mutants!  Seriously, this one looks like he’s got a lizard’s head.


Today, I turned some of the larger mutants into soup for lunch.  Four of them, including the beast above   This is inspired by a recipe from Leites Culinaria., (I just utilised their spicing.)


Ingredients

1-2 tablespoons oil
1 onion, peeled and roughly chopped
1 large clove garlic, crushed
1 tablespoon grated ginger
4 large carrots, peeled and sliced
1 cup/200g split red lentils
2 litres boiling water
2 chicken stock cubes
1 teaspoon ground coriander
1 teaspoon ground cumin
Salt and pepper to taste


Method
  1. Heat the oil in a large saucepan and gently fry the onion, garlic and ginger until the onion is soft.
  2. Stir in the coriander and cumin and fry until the aroma rises.
  3. Pour over the boiling water.  Add all the remaining ingredients and simmer for 20 minutes or until the carrot and lentils are soft.
  4. Blend in the saucepan with an electric stick blender. 
  5. Check the seasoning and serve with fresh bread.
Enjoy!


- Pam (As you can see from the photo above, I like my soups to have a bit of texture.)  

Wednesday, 22 April 2020

Sophie Dahl’s Dhal

I am so going to reek of garlic tomorrow!  Dinner tonight was a sweet potato dhal that involved an awful lot of sliced garlic fried in garum marsala.  The first time I made it, the garlic turned out surprisingly nutty; tonight, not so much.  Oops!

This recipe comes from the BBC television series, The Delicious Miss Dahl, broadcast in 2010.  I think I only caught one episode and, in it, Sophie Dahl talked about working in Bollywood and then went on to make this recipe as an example of the food she lived on while in India.  When it was published on the BBC website, it was called “Sophie’s dhal with lemon and saffron spiced rice” and included instructions to make your own garum marsala. The BBC only had rights to publish the recipe for a year, or I’d link to it here.  This is my version.  I have never actually made the lemon and saffron spiced rice; I usually just serve it with plain rice, made using the rice trick.  Tonight, I made it with bulgar wheat instead of rice, using the same quantities and method.

This was costed on the cheapest versions of the ingredients that I could find on the Tesco website.  I have allowed 10p for the oil and 10p for ground spices and bay leaves.  It works out at £2.94 for 8 generous servings, which is cheap enough that I’m going to tag it with <£2Dinners.

Sophie Dahl’s Dhal - serves 8

Ingredients

Sweet potato
500g sweet potatoes, peeled and cut into rough wedges (55p)
3 tablespoons oil

Tarka
2 tablespoons oil
1 large onion, sliced (20p)
3 garlic cloves, thinly sliced (5p)
1 red chilli, sliced (10p)
2 teaspoons garum marsala
2 inch piece fresh root ginger, peeled & chopped/grated (19p)

Dhal
500g split red lentils (90p)
1.5 litres boiling water
1/8 teaspoon ground asafoetida
1/8 teaspoon ground turmeric
2 bay leaves
2 large handfuls spinach (30p)

Rice
2 cups Basmati rice (30p)
4 cups boiling water

Method

  1. Place the oil for the sweet potato into a roasting dish.  Place in the oven and preheat the oven to 200C.
  2. Place your chopped sweet potatoes in a saucepan, cover with boiling water, bring back to the boil and simmer for 10 minutes or until soft.
  3. When the sweet potato has finished simmering, drain well.  Remove the baking dish from the oven and carefully toss the sweet potato in the hot oil, until as much as possible is coated.  Try to get each wedge of sweet potato standing separately in the baking dish.  Grind over salt and pepper.  Bake in the oven for 20 minutes or until crispy.
  4. Meanwhile, place your lentils in a larger pot, cover with 1.5 litres of boiling water, add the asafoetida, turmeric and bay leaves.  Bring back to the boil, turn down to a simmer and simmer for 15-20 minutes or until almost all the water is absorbed and the dhal is soft.
  5. Once you have put your sweet potato in the oven, do your rice, reusing the saucepan.  Combine your rice with double the quantity of boiling water, cover, bring back to the boil and boil for 2 minutes.  Turn off and let sit for at least 15 minutes or until all the water is absorbed and the rice cooked.  
  6. At the same time, make your tarka.  Heat 2 tablespoons of oil in a frying pan and gently fry the onion until soft.  Stir in the garlic, ginger, chilli and garum marsala and fry for another 3-5 minutes or until soft, stirring continuously or your spices may burn.  Remove from heat and leave until the lentils and sweet potato are cooked.
  7. When everything is cooked, stir the spinach, tarka, and sweet potato into the lentils and serve with the rice.


- Pam

Tuesday, 21 April 2020

Warm French Lentil Salad

Today’s recipe is a frugal favourite that I discovered on a trip to Paris in July 2007.  DH’s cousin lived near the Trocadero and had organised a surprise birthday party for her mum  at a restaurant near the Jardin Du Palais Royal.  I wish I could remember its name.  The restaurant was beautiful inside, very Belle Époque, and the food was delicious.  The service was lovely, too (they treated DH’s mum and aunt like queens).  My choice for starter was a warm lentil salad, which they made with small, black, Puy lentils and the type of anchovy that is marinated in vinegar or lemon juice not salted.   

This is my version.  On occasion, I’ve added smoked mackerel instead of anchovies but it also works well with shavings of a strongly flavoured, air-cured ham.   In the version in the photograph, I used leftover roast duck.  The fish (or meat) just adds an extra flavour dimension but isn’t essential - ou can leave it out completely and I have excluded it in my costings.   The red pepper adds crunch and sweetness;  you could use a yellow one instead.   (I have seen a version of this recipe that uses thinly sliced radish.)   It goes well when served on a bed of baby spinach leaves or watercress.

Quantities given feed four as a main course.

Warm French Lentil Salad. (£1.50 excluding optional fish/meat)

Ingredients

2 cups small black lentils. (50p)
3 spring onions, sliced. (30p)
1 sweet red pepper, sliced into 1-2 inch strips. (32p)
4 tablespoons extra-virgin olive oil  (20p)
2 tablespoons white wine vinegar (or sherry vinegar or white balsamic vinegar). (10p)
1 tablespoon Dijon mustard  (10p)

Optional:  125g (approximately) marinated anchovies, drained, or smoked mackerel or shavings of air-dried ham (e.g. pancetta)

Method

  1. If you have time, soak your lentils for an hour first.  Then drain well and deposit in a mid-sized saucepan.  Cover with boiling water, bring back to the boil and simmer for 15 minutes until soft.  (If you forget or don’t have time to soak the lentils, you will need to simmer for 30-40 minutes.)
  2. Meanwhile make your vinaigrette, combine the olive oil and the white wine vinegar in a blender, add the Dijon mustard and process until smooth.
  3. When the lentils are cooked, drain them well and decant them into your salad bowl.
  4. While still hot, pour over the vinaigrette.
  5. Now prepare your vegetables and grill your mackerel (if using), shredding it into lumps once cooked and crispy.
  6. Stir the pepper, spring onions and fish into the warm lentils, then serve.


Enjoy!  We had it for dinner last weekend.

- Pam

Friday, 10 April 2020

Mexican Pilchard Pudding

Hi.  How are you?  Are you well?  It’s amazing how many emails I have sent or received that include “I hope you are well” in either the opening paragraph or in the sign off.  “We’re fine”, I respond, “Still healthy.”  So far, I know a handful of people who have had Covid-19, including a couple of colleagues on my project, who had been working together in the south-west, just before their symptoms started nearly three weeks ago.  They’re recovering well.

Are you able to work?  DH has been working from home (“WFH”) for four weeks now, while I’d been going into the office to work with a visiting Australian colleague (aka “the Stray Australian”) until Boris announced the Lockdown on Monday 16th March, at which point the office officially closed.  The Stray Australian flew back to Oz on March 19th and is now working in his evenings, while I'm starting an hour earlier than usual so that our days overlap.  The only other difference is that, instead of sharing one big screen and sitting on opposite sides of a 2 metre wide boardroom table for 8 hours a day, we’re spending half the day talking and screen sharing via MS Teams.  He signs off at about noon, UK time, leaving me with a list of tasks to complete in the afternoon. Most days, that’s fine but I think I hit a low point yesterday afternoon, when I completely lost my mojo after trying - and failing - to make a report work for me.

The weather changed last weekend.  We went from bitterly cold and rather damp to hot and sunny, in the space of 24 hours.  Until that point, going for a daily walk was an unwelcome necessity to burn off calories and expand the lungs.  “I wish we had a dog,” I grumbled to DH one day, “then at least somebody in this household would be enthusiastic about going out for a walk!”  Today, we walked for an hour and saw, maybe, 20 people doing the same thing.  There’s an odd dance that people do now when you encounter them walking, “Are you going to cross to the other side of the road, or shall I?”, before one or the other crosses over.

Today’s recipe is brought to you via the back garden, where we are sitting in the sun while listening to the radio.  It originated in a Mexican cookbook published by Sainsbury’s, 30-odd years ago.  I have no idea where my copy is - I just went looking for it - so I can’t tell you the author.  Anyway, this is a store-cupboard recipe, that I made the other night for the first time in years, having internalised the recipe back in the 1990’s.  Coatings are based on the prices in Lidl.  If you don’t have pilchards, you can used a can of mackerel in tomato sauce instead. 

Mexican Pilchard Pudding - serves 4 - cost £1.50

Use an 8-10 inch (20-25cm) oven proof casserole or soufflé dish, something that is at least 4 inches/10cm deep.

Ingredients

500g potatoes, mashed (see step 1 below). - 25p
1x450g can Pilchards in Tomato Sauce - £1.10
1 egg, beaten - 10p
1 teaspoon baking powder - 5p

Method

  1. If you don’t have mashed potatoes to hand, boil the kettle.  Meanwhile, peel, wash and trim 500-600g potatoes.  Cut into 5mm thick slices and layer into a saucepan.  Cover with boiling water, place the pan onto a high heat and bring back to the boil.  Turn down to a simmer, add a pinch of salt and then simmer for 15-20 minutes or until soft.  Place a jug in the sink and pour the potato water into that as you drain the potatoes.  Mash the potatoes, adding the potato water as necessary until you have a light but dry mash.
  2. Preheat the oven to 180C.
  3. Meanwhile, tip the tin of pilchards into your baking dish and mash with a fork.
  4. Sprinkle over the baking powder and beat in the egg.
  5. Finally, fold in the mashed potatoes.  Smooth over the top and bake for 45 minutes.
  6. Serve with a green vegetable for contrast, either broccoli or garden peas.


Enjoy!

- Pip

Saturday, 28 March 2020

Pizza!

Over the years, I think that I may have mentioned our annual attempt at growing tomatoes.  We don’t grow a lot, just two or three plants.  Last year, we had a bumper crop so I made several tubs of tomato sauce and shoved them in the freezer.  We used one tub last weekend over pasta, and it was lush!  It was so tasty that I immediately started planning to make pizza for dinner on Friday night.  Since my pizza recipe is straightforward, I thought I’d share it with you.

At it’s most basic, this recipe produces two “Neapolitan Pizzas” of dough + sauce + mozzarella for £1.80 and feeds 4.  It takes 3 hours.

Start with the dough.  This comes from an edition of Self magazine, that I purchased in (probably) 1992.   It is so simple that it didn’t take me long to internalise the recipe.  I have made this hundreds of times.   Please read the notes at the bottom before proceeding.

Pizza Dough - makes 2, 12-inch pizzas (approximate cost 20p)

Ingredients

2.5 cups of flour (yes, two and a half measuring cups)
1 cup tap water
1 sachet or two teaspoons of easy bake yeast
1 teaspoon olive oil (can be left out)
2 pizza trays (or see note 5 below)

Method

  1. Hand method:  Take off your rings.  Place your flour into a large bowl.  Scatter over the yeast, then make a well in the centre and pour in the water.  Coat your hands with the olive oil, allowing the excess to drip into the mixture.  Using your fingers, fold the flour into the water.  Continue until you have a smooth dough.
  2. Food processor method:  combine all the ingredients in the bowl of the food processor and process until a ball of dough is formed.  Turn the dough out into a large bowl.
  3. Both methods:  if the dough is too sticky at this point, kneed in a little extra flour.  If too dry, kneed in a tablespoon or two more water.
  4. Drape a clean tea towel over the bowl, and place it somewhere warm to rise for an hour.  While waiting, make your tomato sauce.
  5. Take off your rings.  Using your hands, knock back the dough.  (Give it a good thump, then kneed for a minute or two.). Cover and leave in a warm place for another hour.
  6. Knock back your dough again then divide it into two halves.  Form each half into a ball. 
  7. Scatter flour over your work surface and rub into your rolling pin.  Place the first ball of dough into the centre of your work surface and roll it out until it is a) circular, and b) fits your pizza tray.  Carefully lift it onto your pizza tray.  Repeat with the other ball.
  8. At this point, put your oven on to preheat at 240C.  Allow the dough to rise for a further 20 minutes, before covering with toppings.  Meanwhile, prepare your toppings.
  9.  Top your pizzas and bake at 240C for 10-12 minutes.  Serve.

Notes:-

  1. You might have noticed, that I keep telling you to take off your rings.  Yeast dough can be incredibly sticky and hard to remove from your hands.  You don’t want it caught up in your rings.  If you do get coated in dough, soak your hands in water and wash well until the damn stuff comes off.  Don’t be tempted to wipe if off on a towel, because it’ll harden to cement.  (I learnt this the hard way.)
  2. To help stop the dough sticking to you hands, drizzle a small amount of olive oil into the palm of one hand and rub over both palms and your fingers.  They will be greasy.
  3. Only baking for one or two?  The dough freezes well.  At the end of step 6, lightly grease the inside of a freezer bag, drop in one of the balls of dough and freeze.  Remember to label the bag first.
  4. No rolling pin?  Use an empty wine bottle or any similar shaped, tall, round, glass bottle.  Remove the label first.
  5. No pizza tray?  Or only one?  You could use a flat cookie tray and form a lip around the edge of your pizza, to keep the toppings inside.  Alternatively, if you only have one tray, you could leave the second half to rise again as a ball of dough, while the first one is cooking, but that will mean a two-part meal.
Now for the sauce.  This is based on one from Delia Smith (aka St Delia of the Kitchen) but it’s not in the book that I thought it came from.  The flour is to stop it separating and to help thicken it.  (Tomato sauces have a tendency to separate and split.). It freezes well.

Tomato Sauce (approximate cost 65p)

Ingredients

1 onion, finely chopped (10p)
1-2 cloves garlic, crushed (5p)
2x400g cans chopped tomatoes (or the equivalent of home grown). (50p)
1 heaped teaspoon of flour
1 teaspoon dried basil
I-2 teaspoons muscovardo sugar
Possible splash lemon juice or vinegar
1 tablespoon oil

Method

  1. In a decent sized saucepan, heat the oil over a low heat and gently fry the onion until it turns clear and glassy.  Stir in the garlic and fry for a minute or two longer.
  2. Scatter over the flour.  Stir well to ensure everything is covered.
  3. Pour in both tins of tomatoes, stirring continuously and bring to the boil. Turn down to a simmer and stir in the basil and one teaspoon of sugar.  
  4. Simmer until very thick. (This may take 20-30 minutes.) 
  5. Taste the sauce.  Is it too sweet?  Or too sour?  If too sweet, stir in a splash of lemon juice (from a bottle).  If too sour, stir in the second teaspoon of sugar.
  6. Allow to cool before spreading thinly on your pizza base.
Note: you may have sauce left over.  Don’t be tempted to pour it onto the pizzas - it will make for a watery, soggy pizza and your toppings will slide off.


Suggested Toppings

Scatter any combination of the following over your pizza:-

2 x Mozzarella balls, grated  (90p)
100g cheddar, grated (34p) - add to the mozzarella
1 can anchovies, drained (70p)
Sliced pepperoni or salami or chorizo or ham
Thinly sliced mushrooms and/or peppers
Thinly sliced olives
Leftover oven roasted sliced veg (peppers, mushrooms, onions)

Once, baked, the results should look like this.  


Yum!!

- Pam

Tuesday, 10 October 2017

Slow Cooker Cuban Black Beans

We were introduced to Cuban-style black beans by The Lost American.  It's classic peasant food:  slow cooking cheap meat (smoked ham hock) with dried beans, to feed as many as possible.  Ham hock is hard to find here, so generally speaking I use bacon off-cuts aka "cooking bacon" which I can buy for 60p for 500g.  Once or twice, I've used lumps of ham.  When I have found ham hock, it was sold from the hot-meat counter at the supermarket for several Pounds each.

This is one of those meals which you suddenly find yourself craving.  I think that's down to its smokey flavour.  The only downside to cooking it in a slow cooker/crockpot is that everything comes out a dark brown  colour.  Please read the notes section before you proceed. 

The cost is between £2 and £3 depending on how much bacon you use and assuming 10p for the cheapest herbs and spices.  This makes at least 5 portions of soupy stew, more if you serve it over rice.

Ingredients

500g black turtle beans, soaked overnight and drained (£1.10)
1 onion chopped (12p)
6 cloves garlic, crushed (10p)
2 green peppers, roughly cubed (40p)
150g-500g  cooking bacon, roughly chopped (or use leftover ham, see notes below) (18p-60p)
2 chilies, chopped (or 1 heaped teaspoon ground chilli)
1 smoked dried pepper (if you are lucky enough to find them) (say 50p)
1 bay leaf 
1 tablespoon oregano 
1 tablespoon ground cumin
2 tablespoons white vinegar
1/2 teaspooon liquid smoke (2p)
Boiling water to cover

Method

  1. Combine all the ingredients in the slow cooker.  Ensure that there is at least a 2.5cm (1 inch) covering of boiling water, more if your slow cooker lid doesn’t seal well.
  2. Put the lid on, set the cooker to high and cook for a minimum of 8 hours.  
  3. If it gets a bit dry, add more boiling water (cold water will cause the pot to crack).
  4. If it turns out soupy, serve with lots of fresh bread.  Otherwise, serve over rice.


See what I mean by brown?

Notes:-

  • Slow cookers/crockpots are meant to have well-fitting lids that seal so you need less liquid.  I’m on my third and, as far as I’m concerned, that’s a bit of a myth.  The original crockpot has a rubber gasket around the lid and that does seal.  For all the others, you’re dependent upon how well the lid fits the rim.  My current one has certainly boiled dry.  
  • You need to cook this on high for the beans to go soft.  (It should be possible to mush them with a spoon.)  The first time I cooked this, I used  “automatic”, which starts off as high and then swaps to low after 2 hours.  We got home 12 hours after it started cooking and the beans were still hard.
  • I can only find black beans, aka black turtle beans, in Waitrose.
  • Where do you get the Liquid Smoke?  Ocado sell a 148ml bottle of Stubbs Liquid Smoke for £1.89, so I based the cost on that.  My bottle is years old.

- Pam

Tuesday, 30 May 2017

Recipe Tuesday: Middle-Eastern Chicken Livers

This past weekend, was one of those which you look forward to for weeks, involving lots of planning when you think everything is coming together really well and then it all falls apart spectacularly.  Saturday was the FA Cup Final, Chelsea vs Arsenal. Being season ticket holders at Chelsea, DH and I managed to secure tickets so went to Wembley.  We lost.  The final score of 2:1 to Arsenal does not do justice to how terrible Chelsea played.  Without some miracle defending in the first half, the score would have been 5:1.

Sunday, the RPG I play in nearly got derailed by a certain participant's sense of humour.  One of our party is schizophrenic.  This person thought it would be funny to wind him up.  It isn't.  It is nasty.  And the GM let him know in no uncertain terms that such behaviour was not tolerable.  But it led us down a rabbit hole, we'd rather have avoided.

Yesterday, was a quiet, pottering around sort of day.  Monday was a bank holiday in the UK, so we slept in and watched far too much pre-recorded TV.   Any hope of attacking the lawn - in desperate need of a mow - or planting out the courgettes was derailed by rain.   Then along came dinner.  Recipe below.  I'd reached the final stage, where you stir in the yoghurt, when I opened the tub that had been lurking in the fridge for a few weeks and realised it was furry.  Definitely growing some sort of white fungi or bacteria.   Help!

DH came to the rescue, popping to the shops at the end of the street, while I switched everything off and stirred like mad to prevent the chicken livers over-cooking while we waited.  

Years ago, I wrote a blog post about chicken livers and I was quite surprised to discover that I hadn't included this recipe in it.  This is the first, non-pate chicken liver dish that I learned to cook.  It originally came from one of those week-by-week compendiums, collect all the parts and build yourself an amazing recipe collection, etc...  (You know the type.).  This is my version:

Middle-Eastern Chicken Livers

Serves 4

Ingredients

2 tablespoons oil/schmaltz 
350g-500g Chicken Livers
1 large onion chopped
150g mushrooms, sliced
1 large clove garlic, crushed
2 peppers/capsicum sliced (green or red are best for colour contrast)
2 carrots, sliced
1 teaspoon Worcestershire Sauce
400ml plain yoghurt
A tablespoon of chopped coriander 

Spices
1 teaspoon curry powder (see note below)
1/2 teaspoon ground cumin
1/2 teaspoon ground ginger
1/2 teaspoon ground paprika
1 teaspoon flour (plain, self-raising or cornflour will do)

Rice
1.5 cups Basmati rice
3 cups boiling water

Method
  1. Put the kettle on to boil for your rice.  Meanwhile, prep all your veg.  When the kettle has boiled, measure your rice into a saucepan with a tight fitting lid, add twice as much volume of boiling water, cover and boil for 2 minutes.  Switch off and leave undisturbed for 15 minutes.
  2. Combine the spices in a small ramekin dish.  Stir in a tablespoon or two of water to form a thick paste.
  3. Heat the cooking fat in a deep frying pan.  Fry the onion until it is soft and clear.
  4. Add the mushrooms.   Fry, stirring occasionally, until the mushroom water is almost evaporated then add the garlic and the peppers, stirring occasionally until the peppers have softened.
  5. Decant the veggies into a bowl.  Return the frying pan to the heat, add a little more oil if necessary.  Turn the heat down.  Spread the chicken livers over the hot surface.  Fry until browned on all sides and the livers are firm.  (Be gentle with the heat or they will toughen.)
  6. Return the veggies to the pan.  Add your spices and fry until the aroma rises.  Stir in the yoghurt, Worcestershire sauce and the carrots.  Bring to a gentle simmer and simmer for five minutes, stirring occasionally.  
  7. Scatter over the coriander and serve.  Enjoy
 

Notes

  • If you keep kosher, this works with soy-based non-dairy "yoghurt".
  • If you keep kosher and kosher your livers with flame before cooking with them, skip step 5.  Add your spices to the frying vegetables, then stir in the livers and proceed as per step 6 above.
  • I use home made curry powder, aka "Curry Powder Number 1".  In a small spice jar mix:  1 teaspoon of ground chilli, 2 teaspoons ground cumin, 2 teaspoons paprika, 1 teaspoon ground turmeric and the seeds from 6 green cardamom pods.  Put the lid on tight and shake vigorously to blend.  This is Curry Powder Number 1.

Tuesday, 28 February 2012

A very un-Kosher pasta dish

Sometimes, a recipe comes from almost nowhere.  That's what happened with this.  A chance glance at a photograph on the BBC Good Food website, led to me dreaming up this recipe on my drive home from work a couple of weeks ago.  It was so visceral, I could almost taste it.  In the end, I gave into my cravings, dug out the non-kosher cookware and came up with this:

Bacon and cream cheese pasta

Serves 4 to 6

Ingredients

150g bacon trimmings

1 onion sliced
1 clove garlic, crushed
100g mushrooms, sliced
250ml dry white wine
200g cream cheese
30g or so of freshly grated Parmigiano-Reggiano cheese (real "parmesan" not that Danish fake rubbish)
500g pasta shapes (I used quills because that is what I had)

Method

  • Put the water on to boil for the pasta.  Cook the pasta according to the packet's directions.
  • Meanwhile, prepare the onion, garlic and mushrooms and proceed with the rest of the recipe.
  • In a non-stick frying pan, dry fry the bacon until the fat begins to run.  Stir occasionally.
  • Once there is fat in the frying pan, add the onion and continue frying it until the onion becomes glassy/clear.
  
  • Stir in the mushrooms and the garlic.  Continue frying, stirring occasionally, until the mushrooms have made water and it has evaporated.
  • Pour in the white wine and bring to the boil.  Stir in the cream cheese and keep stirring until it has melted and the sauce is creamy.  Switch off the heat and stir in the parmesan.
 
  • Drain the pasta and return it to the saucepan.  Pour over the sauce.  Season with freshly ground pepper and serve.
  
 
Enjoy.
 
- Pam

Tuesday, 21 July 2009

Mmmm.....Moussaka

I'm still lusting after the moussaka I cooked for dinner last night and had again for lunch today. It was scrummy(!!!) so I thought I'd share.

My recipe is based on one from the Greek Cookbook by Tess Mallos, which I bought in a secondhand bookshop in Melbourne in 1997. I've modified it a little - the original uses a white sauce, whereas mine uses plain yoghurt.

Lamb Moussaka - serves 4-6

Ingredients

2-3 Aubergines/eggplants, sliced 1/4 inch thick
500g/1lb minced/ground lamb
1 large onion, chopped
2 large cloves of garlic, crushed
150-200g/6-8oz mushrooms, sliced (optional)
1 x 400g/14oz can chopped tomatoes
2 tablespoons tomato puree/paste
1/2 cup of red wine
1/4 teaspoon cinamon
1 teaspoon sugar
300ml (approx half a pint) of plain yoghurt
2oz/50g freshly grated parmisan cheese or very strong cheddar
2 eggs
Nutmeg
Olive oil

Method
  1. Pre-heat the grill/broiler. Lightly grease a large baking tray and cover it with aubergine slices. If possible, try to keep it to a single layer. Brush the top of each slice with olive oil. Grill/broil for 30 minutes, turning at half time. The aubergine should be soft and browned.
  2. Meanwhile, prepare the other ingredients.
  3. Heat a frying pan or large pot. Crumble in the lamb and dry fry until browned. Stir in the garlic, onion and mushrooms, if using, and fry in the lamb fat until the onions have gone clear and the mushroom "water" has evaporated.
  4. Stir in the chopped tomatoes, tomato puree, cinnamon, sugar and wine. Bring to the boil, then simmer for 30-45 minutes or until the sauce is thick.
  5. When the sauce and aubergine are ready, preheat the oven to 180C.
  6. Line a lasagne dish with a layer of aubergine. Check out how much you have left - is it half or two-thirds? If it is half, pour all the sauce over the first layer and cover with the remaining aubergine. If it is two-thirds, pour half the sauce over the first layer of aubergine, cover with a second, pour over the rest of the sauce and cover with a final layer.
  7. In a bowl or jug, beat the eggs together then stir in the yoghurt until thoroughly combined. Grate over some nutmeg - 5 rubs of the nutmeg over the grater should do. Stir it in.
  8. Carefully pour the yoghurt mixture over the contents of the lasagne dish (it tends to run off the sides!). Try to get an even coverage. Sprinkle over the cheese.
  9. Bake for an hour, then let sit for 10 minutes before serving to firm up.

Notes
  • If you keep Kosher, use a soy-based fake yoghurt instead of the plain yoghurt and forget about the cheese. That works well.
  • Jewish cookery writer, Evelyn Rose, in the Jewish Cronicle, suggested using coconut milk mixed with eggs as a non-dairy substitute for the traditional white sauce I've not tried this variation, but she said it made a rich topping which brought out the sweetness of the lamb.
  • The recipe book suggests using courgettes/zucchini instead of aubergine. Yet another way of using up a glut of zukes.
- Pam

Tuesday, 7 July 2009

Pizza!

A couple of weeks ago, we scored 6 x 100g balls of organic buffalo mozzarella cheese for 70p a ball, approximately half price. My first thought was "pizza!" followed by "lasagna". Four of the balls went straight into the freezer. The other two languished in the fridge until the Friday, when I made my first pizza for nearly 6 years.

That's right. I haven't made a pizza since we moved into this house, mainly because my gas-hob-electric-ovens stove isn't wired in. Our only working oven is a combination microwave-convection oven and I'd never considered it as a pizza oven. With DH's encouragement, though, I thought I'd have a go. After all, what's the worst that could happen? We could always phone out for a takeaway.

Turns out, the dough recipe is engraved on my brain (just as well - I don't have the magazine I got it from). So was the tomato sauce recipe. Even more surprising, the ancient freeze-dried instant yeast still worked (use by date October 2001).

Notes

Make the tomato sauce while the pizza dough is rising. It needs to be cool before you dress the pizza.

Pizza Dough Recipe (makes sufficient for two pizzas)

Ingredients

2.5 cups strong flour (I used wholemeal)
1 cup of tap water
1 sachet instant yeast
Pinch of salt
Olive oil

Method

  1. In a food processor, combine the flour, the salt and the yeast granules.
  2. Through the feeding tube, gradually add the water until the dough forms a ball. Note: you may not need all the water - it depends on the ambient humidity.
  3. Flour a pastry board or the kitchen worktop. Turn the dough out onto the board and knead by hand for a minute or so.
  4. Oil a large bowl. You can use spray oil or pour in a teaspoon or so of oil and swish it round.
  5. Place the dough in the bowl, turning it over until it is covered in oil (this stops it getting hard on top). Cover with a tea-towel and place somewhere warm and draft free to rise.
  6. When the dough has doubled in size (in approximately an hour), "knock it back": punch the middle of the dough to release the accumulated gasses and knead it for a minute.
  7. Cover again with the tea-towel and set the dough aside for its second rising.
  8. Repeat step 6. This time, though, after kneading the dough divide it into two and form into balls. If you are only making one pizza, pop the second ball into an oiled plastic bag and freeze.
  9. Flour your pastry board again and a rolling pin. Roll out the dough until it fits your designated pizza dish (I used to use a rectangular cookie sheet with a small lip, now I have a round one). Gently ease the dough into the pizza dish and leave it to rise for 20 minutes or so.
The dough freezes well. Defrost it in the fridge, then follow step 9 above.


Pizza sauce (makes enough for two pizzas)

Ingredients

1 tablespoon olive oil
1 large onion, finally chopped
2-3 cloves of garlic, crushed
2 x 400g/14 oz cans of chopped tomatoes
1 bay leaf
2-3 black peppercorns
1/2 teaspoon of sugar
1/2 teaspoon dried basil
1 tablespoon tomato puree/paste

Method

  1. Heat the oil in a large saucepan. Gently fry the onion and garlic until the onion is transparent but not coloured.
  2. Add the remaining ingredients. Bring to the boil and simmer for at least half an hour or until thick.
  3. Remove the bay leaf, switch off the hob and allow the sauce to cool.
  4. If the sauce is too chunky for your liking, liquidize it to suit.
The sauce freezes well and can be used for pasta.

Assembling the Pizza

While the dough is rising in the pizza dish, prepare your other ingredients. We usually use a drained can of tuna, some salted anchovy fillets, sliced peppers and an equal mix of grated cheddar and shredded mozzarella cheeses.

If you like mushrooms on your pizza, you'll need to prepare them a day or two in advance. Slice the mushrooms thinly and let them dry out as much as possible, otherwise your pizza will drown in the liquid they release.

Preheat the oven to 250C.

Thinly spread the pizza sauce on the freshly risen dough in the pizza dish. Layer over your other ingredients.

Place the pizza on the top shelf in the hot oven and bake for 12 to 15 minutes or until cooked.


Serve. Yum!

- Pam

Tuesday, 25 December 2007

Chrismas Turkey - part one

We do two Christmas dinners each year: Polish Christmas on Christmas Eve, and then a late lunch on Christmas Day. Usually, that means I'm the cook. On Christmas Eve, I do the full round of food: starter, roast turkey dinner and Christmas Pudding. On Christmas Day, it's leftovers: cold turkey, cold chestnut stuffing; a fresh round of roast potatoes/onion/garlic and I'll do a nut-roast.

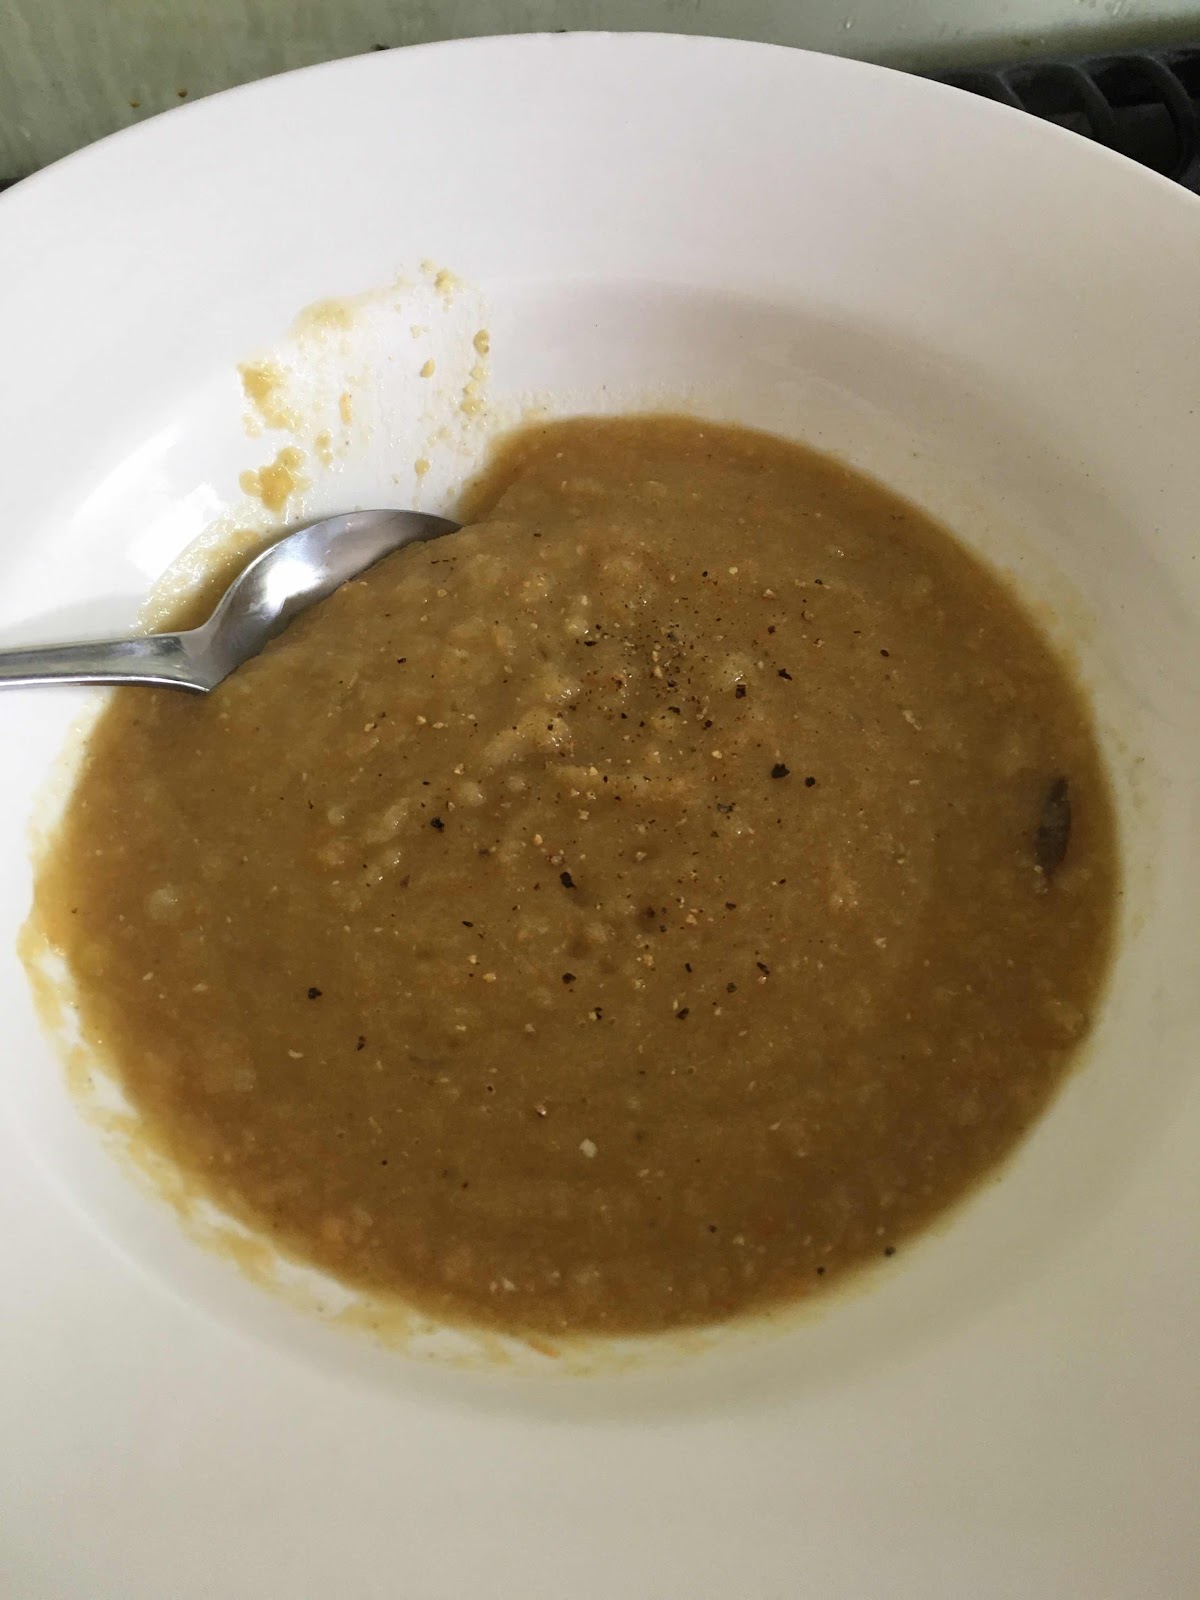
It's Christmas morning here, so I'm half way through. There are big advantages to doing your main Christmas Dinner on Christmas Eve: I don't have to worry about getting up at the crack of dawn to get the turkey ready and I have most of Christmas Eve to do the cooking. Normally, I stuff the bird on the 23rd, take it out of the fridge at 12 o'clock on the 24th to bring it up to room temperature and shove it in the oven around 2.30pm. Then I prep the veggies and start cooking those at about 6pm. I often do a veggie soup for a starter - it was my way of sneaking some vitamins into my FIL - this year was pumpkin and saffron soup.

This year, I still don't have a working full-sized oven (it's only my fifth Christmas without my stove wired in. Next year, I tell myself, I will have the kitchen sorted. Oh, yes, I will!). So I stuffed the monster turkey (7.8kg/16lb) and lugged it around to my MIL's to roast. There are three of us celebrating Christmas here this year, so maybe I should explain my turkey philosophy. In a nutshell: regardless of how many people are coming to dinner, always buy the biggest bird that'll fit in your oven and/or freezer. (I have been known to do length and side elevation measurements to ensure my turkey will fit. That always entertains the butcher.)

Here's why:
  • small turkeys are largely bone so the ratio of meat to bone is lower on a small bird than on a large one; getting a large one ensures you're buying mostly meat
  • it takes as much time to prep a small turkey as it does a larger one
  • once the bird is in the oven, the cooking labour involved is minimal
  • leftovers
Actually, I reckon the last point sums it all up. Leftovers. Savour the word. Mmmm... leftovers. Come on, say it with me: L-E-F-T-O-V-E-R-S.

What? The thought of turkey leftovers doesn't make your mouth water? You've had so much dry, stringy turkey that on Boxing Day you want to throw the whole thing in the bin? More about the leftovers later....

First, roast your turkey

If you can't afford a premium, organic/free range bird that's grown slowly and knew how to gobble, per Jamie Oliver the secret is to shove butter or fat up under the skin over the breast meat, which will slowly baste the bird from within. At the neck end of the bird, shove your finger up under the skin towards the breast bone and gradually make a pocket. Then insert your butter and work it along under the skin until the upper breast area is covered.

Me? Well, we put money aside all year in the Christmas Fund to pay for our turkey, tree and all the trimmings. This year's bird cost £66; last year's was £70. The year before's was £38 but that was before bird flu put up the price of poultry. What we get for our money is a turkey with ample amounts of fat on it, so I've never worried about it drying out. Note: I have cooked supermarket turkeys in the past. Paying all that extra at a butcher shop really does make a difference.

What I do to cook the turkey is stuff the turkey with my Chestnut Stuffing, put it breast down into the roasting pan, baste it with a mixture of white wine and olive oil, seal it into the roasting pan with foil and roast it for 30 minutes per kilo/15 minutes per lb at 180C /gas mark 6/360F. In a gas oven, I'd rotate the baking dish every half an hour so that it cooks evenly. At half time, I'd turn the bird over to breast side up and pour over some more of the white wine/olive oil mixture.

Keep the turkey in it's foil tent throughout the cooking time. It'll still get nice and brown.

Plan your meal so that the turkey finishes cooking half an hour before you want to serve it. Remove it from the oven and either leave it in the roasting pan or put it on a warm platter. (NB: If you want to make home-made gravy, drain off the juices at this point and shove the container into the freezer.) Cover it with a good layer of foil to keep it warm.

Carve your bird and put the slices of meat onto a warmed serving dish, with the stuffing in the middle.

The Baste

Mine is a half and half mixture of white wine and extra virgin olive oil, say 200 ml of each, put into a sealable container. Grind over some pepper, say, 20 grinds worth and stir in some taragon (1 teaspoon dried). You may also want to add some salt, but I don't usually bother. Shake well and pour half the mixture over the bird before you start roasting. When you turn the bird over, pour over the other half. Each time: grind over salt and pepper and whatever herbs/spices you want after you've annointed the bird.

The Stuffing

This is my chestnut stuffing:

In a food processor, combine:-
  • 4 slices of bread (I like using a grainery bread for this for the texture)
  • a small onion, peeled and halved or quartered
  • 4-6 cloves of garlic
  • 4-6 peppercorns
Process until the bread has crumbed and the onion and garlic are chopped fine. The peppercorns will make a bit of a racket, but will infuse the mixture with pepper. Then add:-
  • 1 egg
  • the grated rind of two oranges
  • 1 can of unsweetened chestnut puree (approximately 400g/14 oz). If you can't get this use 12 oz of peeled, cooked chestnuts and add extra orange juice
  • 100ml/4 fl oz approximately of orange juice (or enough to make a smooth paste)
Process until it forms a smooth paste. Loosely stuff into the cavity of the turkey, adding an extra half an hour of roasting time.

The Veggies

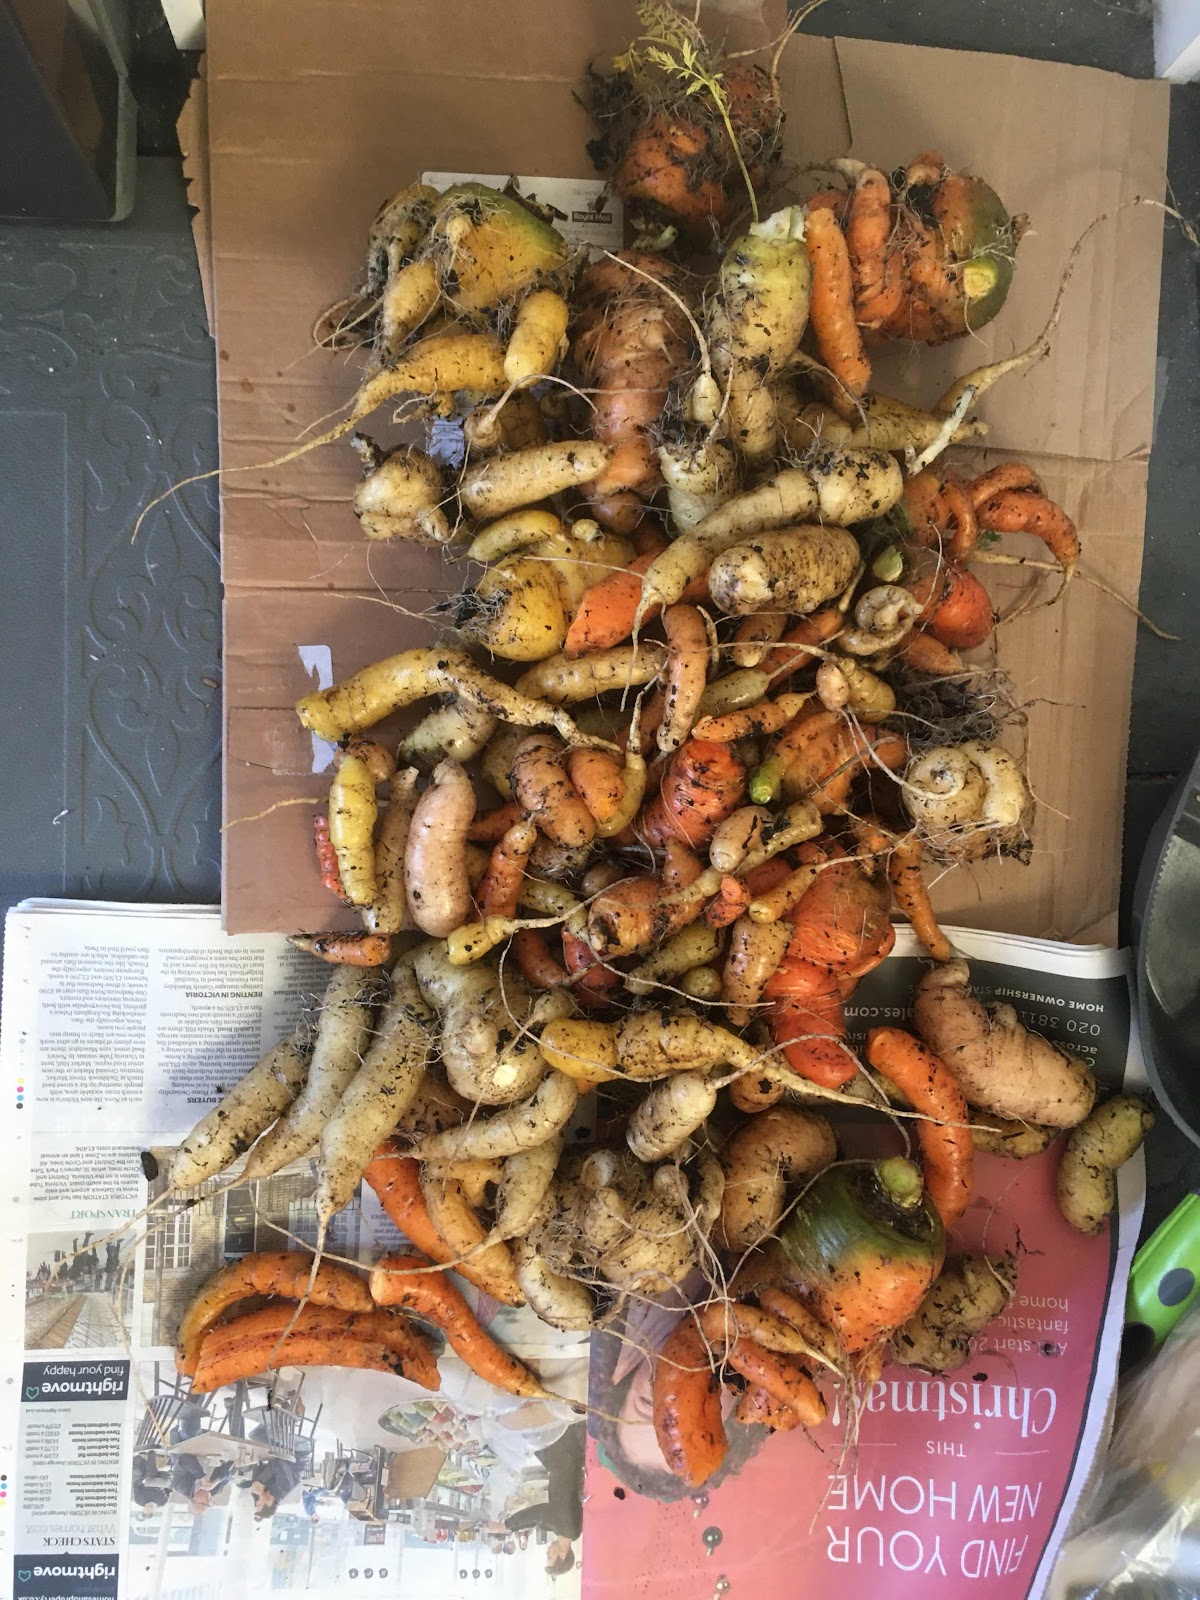
I always do roast potatoes, roast onions and baked garlic. Sometimes I'll roast pumpkin and parsnips, too.

Since British ovens are small, I do my veggies in a separate baking tray. Prep them all first: peel the potatoes and par-boil them for 15 minutes (see below). Top and tail the onions and peel them. For the garlic, take a bulb per person and remove as much of the external paper-like covering as possible, exposing the cloves in their wrappers. Wrap each bulb separately in foil (shiny side in) pouring over a teaspoon of olive oil (or dotting it with a teaspoon of smaltz) before you seal it in.

About an hour before you are due to take out the turkey, grease your baking tray, add the onions (turning in the oil) and garlic and put into a hot oven to heat the fat. Add the potatoes when they are ready.

The potatoes are par-boiled for 15 minutes, drained, sprinkled over with some fine-ground mazoh meal, tossed then turned into hot fat and roasted for 50-60 minutes at 180C/360F. You can par-boil them in advance, drain them and toss with the mazoh meal and stop at this point until you're ready to cook them. They will take a bit longer to roast, maybe an extra 10 minutes since they're cold.

After about half an hour in the oven, turn the potatoes and onion to expose a different side to the cooking and baste if possible with hot fat.

Put your veggies into a warmed serving dish and serve.

Gravy

I use drain off the liquid in the bottom of the roasting pan and use that to form the basis of my gravy. I'll freeze it for half an hour or so, to facilitate separating the fat from the gravy, and then pour off the fat into a separate container to save for making smaltz.

About five minutes before serving dinner, bring the juices to the boil in a small saucepan. Taste: if it needs salt or pepper add it now; if it isn't very tasty, add a chicken stock cube now.
Meanwhile, combine 50ml of white wine with 1 tablespoon of cornflour in a small dish. Add to the saucepan and, stirring all the time, bring back to the boil. Turn down to a simmer and simmer for 3 to 5 minutes.

Pour into your gravy boat and dinner is ready.

Merry Christmas everyone!

Pam (tomorrow, I'll talk about leftovers)

Thursday, 11 October 2007

Mushroom ragout

It's been a busy evening in the PipneyJane household. Yesterday, DH and I did our main supermarket shop for the month and scored 1.5kg of mushrooms for 28p! Result!

They were in the "Reduced Price" aisle, so needed to be cooked relatively quickly. We already had mushrooms in the fridge, but I can't look a cheap mushroom in the mouth; this evening, I turned my kitchen into a mushroom processing factory. First, I cleaned and sliced 2kg of mushrooms (as I said, we already had some). Then I divided them up and started cooking.

I chopped 5 onions, crushed 6 cloves of garlic, added 800g of mushrooms and made base. That should make 4 or 5 containers for the freezer (it's still cooling, so I haven't dished it up yet). Another 350g of mushrooms went towards making "Mushroom Duxelles", a type of pate (recipe later).

The balance of the mushrooms went towards making Mushroom Ragout. This recipe is based on one from Sue Kreitzman which was published in a Sainsbury Supermarket cookbook. I haven't seen the cookbook for at least 3 years, couldn't find it when I looked, so cooked this from memory. It makes 2 pints, for a total of 14 WW points. I usually freeze half for later.

This works well as a sauce over pasta (I use tagliatelli), as a filling for a vegetarian lasagne or as the basis for a quick, creamy mushroom risotto.

Mushroom Ragout

makes 2 pints or approximately 8 servings


Ingredients

Olive oil spray
1 onion, chopped
750g mushrooms, sliced
20g dried porcini mushrooms
1 x 400g/14oz can evaporated semi-skimmed milk (skimmed would be better, but I can't get it)
300ml/1/2 pint skimmed milk
30ml/2 tablespoons brandy
1 heaped tablespoon dried mustard
25g corn flour
25g/1oz freshly grated parmesan cheese
Pepper in a grinder

Method

  1. Start by preparing the dried mushrooms. Put them into a bowl, cover with hot water (approximately 100ml/4 fl oz) and set aside. They will need approximately 15 minutes to reconstitute.
  2. Spray a large saucepan or wok with the olive oil spray and heat.
  3. Gently fry the onions until soft.
  4. Stir in the fresh mushrooms (yes, all of them), pour over the brandy, add a splash of water and gently fry the mushrooms until they make water. Turn up the heat and reduce the mushroom water by approximately two thirds.
  5. Drain the dried mushrooms through a sieve, collecting the liquid in a measuring jug. (I use a coffee filter for this - it catches any grit.) Chop these mushrooms and add them to the saucepan. Measure the mushroom liquid and top it up to 300ml/half a pint with the skimmed milk.
  6. In a small bowl, combine the dried mustard, corn flour and sufficient of the milk/mushroom liquid mix to make a paste. Stir it into the balance of the milk mixture. Ensure it is well combined.
  7. Add the milk mixture and evaporated milk to the mushrooms in the pan. Stir well. Bring to the boil and simmer for 10 minutes, stirring occasionally.
  8. Just before serving, stir in the parmesan cheese and grind over some pepper. Once the cheese has been added, don't reboil the sauce as it may curdle.
- Pam

Tuesday, 24 July 2007

White Fish Curry

A couple of weeks ago, I was in the supermarket when I said to Kate, "I'm one of the best non-Asian curry cooks in the country". The sentence came out before I had time to censor it - I believe it, but it sounds like a boast.

Ironically, I didn't actually cook Kate a curry whilst she was staying with us. I wasn't sure whether her son would like it. So today's recipe is dedicated to her: White Fish Curry.

White Fish Curry is what we're having for dinner tonight. Like most of my curries, it's versatile and can be cooked with other vegetables than those listed in the ingredients (only the onion and garlic are compulsory vegetables). In fact, today it'll be dominated by the larger of these two whoppers from the courgette bush.


They were small when I last looked at the bush on Thursday, before we went away for the weekend. However, four days of constant, heavy rain later and I've grown a rounders bat! That's a full sized rolling pin beside them.

I sliced the larger of the two and used it instead of the mushrooms in the curry.

White Fish Curry

WW points about 3.5 per serving (including rice). Serves 4.

Ingredients

1 cup easy cook brown rice
Boiling water
500g skinless, white fish fillets, cubed
1 teaspoon olive oil
1 onion, chopped
1 clove garlic, crushed
200g mushrooms, sliced
3 bell peppers, sliced (preferably green)
250ml low-fat plain yogurt
1/2 inch of fresh ginger, grated
1/2 teaspoon ground chili
1 teaspoon ground cumin
1 teaspoon ground coriander
1 teaspoon ground cinnamon
1 teaspoon ground turmeric
1 teaspoon corn flour

Method

1) Prepare all your vegetables.
2) In a small saucepan combine the rice with 2 cups of boiling water. Bring back to the boil, cover and simmer for 25 minutes.
3) Meanwhile, combine the chili, cumin, coriander, cinnamon, turmeric and corn flour in a dish with a small amount of water and mix to a paste.
4) Coat a frying pan with the oil and heat. Fry the onion, garlic and ginger until softened. Add the mushrooms and fry until they make water and the water evaporates. Add the peppers and fry until softened.
5) Stir in the fish. Stir-fry until the fish turns white.
6) Add the spice paste to the pan and fry until the aroma rises. Pour over the yogurt and stir in well. Bring to the boil and simmer, stirring occasionally until the rice is cooked.
7) Divide the rice between 4 plates and serve the curry over the top.

This is what it looks like in the pan:


Enjoy!!


- Pam


Thursday, 5 July 2007

Cheese Pudding

I’ve got two egg yolks in the fridge and not enough motivation to want to spend much time in the kitchen tonight, so this is what I plan to make for dinner. (Now to find out that DH is reading this by whatever comments he makes via email.)

This is a savoury version of Bread and Butter Pudding; to accompany it, I’d serve a green vegetable like broccoli and, maybe, some oven roasted cherry tomatoes (put the tomatoes in when there is only 30 minutes of cooking time remaining). The recipe serves 4. If you omit the butter and use skimmed milk, it is 4 WW points a serving. Use 4 egg-whites instead of whole eggs and it is 3.5 WW points a serving.

You can, of course, omit the tuna if you don't like it.

Ingredients

Wholemeal Bread - 4 slices
Butter 1 tablespoon
50g Cheddar Cheese grated
Sweetcorn - 1 cup
1 can Tuna in brine drained & flaked
Eggs - 2
milk - 1/2 pint
3 or 4 grinds of pepper

Method

1) Butter the bread and cut on the diagonal. Arrange the slices in a lasagne dish (approximately 5 x 8 x 2.5 inches or 12 x 20 x 7 cm in size).


2) Flake over the tuna. Making sure that some gets between the slices. Repeat with the sweetcorn and the grated cheese.

3) Beat together the milk and the egg until well blended. Grind over some pepper. Pour the egg mixture slowly and evenly over the bread mixture.

4) Allow the pudding to rest for approximately 10 minutes. I use this time to preheat the oven to 180 C – when it reaches full temperature, the resting time should be over.

5) Bake for approximately 45 minutes or until golden and set.

6) Remove from the oven and allow to rest for 5 minutes before serving.

- Pam

Tuesday, 26 June 2007

Quick & Low Fat Courgette Lasagne

I've got yellow courgettes (zucchini) growing in my vegetable patch. This is the first time I've grown them, so it's been a bit of a learning curve. Anyway, last week I harvested the first four and made this lasagne. It's based on a recipe from Rosemary Conley's Low Fat Cookbook. (I still haven't unpacked my copy since we moved 4 years ago, so have no idea how much it differs.)

I'll post a photo of the courgette plant when I have access to the camera.

Quick & Low Fat Courgette Lasagne

Serves 4. 3 WW points a serving.

Ingredients

1 teasp Olive oil
lasagne sheets x 6
150ml yoghurt (this is half one 500ml pot - 500ml weighs 300g)
1 egg
1 tablespoon cornflour (cornstarch)
1 tablespoon red wine
1 onion chopped
1 clove garlic, crushed
4 courgettes, sliced
2 x 14oz cans tomatoes, pureed in blender
1 teasp dried basil


Method

1) Heat the oil in a deep pan. Fry the onion and garlic until the onion is transparent (if it starts to burn splash in some water).

2) Add the courgettes and fry until they soften.

3)Stir in the tomatoes and the basil. Bring to the boil then simmer until the sauce is reasonably thick (20 minutes or so).

4) Combine the red wine with the cornflour and stir into the tomato mixture. Bring back to the boil and, stirring constantly, simmer for 2 minutes. The flour stops the tomato separating and should thicken the sauce further.

5) Meanwhile, preheat the oven to 200 degrees C.

6) Beat the egg into the yoghurt until both are combined.

7) When the sauce is thick, assemble the lasagne, in a lasagne dish:

-spread a small amount of tomato sauce (no courgette) across the bottom of the dish, then cover with 2 sheets of lasagne.
- pour over 1/3 of the courgette mixture and cover with another 2 sheets. Repeat.
- cover the last two sheets with the remaining courgette mixture. Spread the yoghut mixture evenly over it to cover.

8) Bake at 200C for approximately 40 minutes or until lasagne is cooked and the top has solidified.


- Pam

Tuesday, 12 June 2007

Cauliflower & Pea Terrine


Today’s recipe is perfect for a cold starter for a dinner party or for the main course on a hot summer day. If you are tempted to serve it hot, good luck – the only time I’ve turned it out hot, it collapsed and started slithering down the side of the kitchen cabinet! That version only had one egg, so next time I made it I doubled the quantity of eggs.

This is perfect if you aren't that keen on vegetables but want to ensure you get your five servings of veggies a day. The cheese tones down the sulpherous taste of the cauliflower - not my favourite vegetable. I've yet to meet someone who doesn't like peas. Don’t know what to do with the other half of the cauliflower? Make Aloo Gobi (recipe next week).

The original version of this recipe is in Rose Elliott’s Cheap & Easy Vegetarian Cookbook. I think hers uses more cheese, too. The method below is all mine.

This recipe serves 4 as a main course, 8 as a starter. A main course serving costs 2.7WW points.

If you want to try a different version, I'd suggest broccoli instead of cauliflower, coupled with sweetcorn. Drop the mint and put the cheese with the corn, not the broccoli. The points would remain the same.

Ingredients

40g/1oz Butter
50g/1.5oz strong Cheddar Cheese grated
125g/4.5oz Green Peas (frozen is fine)
30g/1oz flour
2 Eggs
300ml/½ pint milk (skimmed if doing WW)
1/2 cauliflower
1/4 teaspoon dried mint

Method

1) Preheat oven to 180 C

2) Line a loaf pan with non-stick silcon paper/greaseproof paper

3) Break the cauliflower into florets, place in a saucepan, cover with water, bring to boil and simmer for 5 minutes

4) Meanwhile cook the peas in boiling water for 5 minutes.

5) In a saucepan, melt the butter over a low heat. Remove from heat. Wisk in the flour and blend until smooth, forming a roux. Return to heat, stiring all the time. When the roux is foaming, gradually stir in the milk and wisk until smooth. Bring sauce to boil, stiring constantly. Once boiled, simmer for 10 minutes, stiring ocasionally. (Sauce very thick).

6) When vegetables are cooked, drain them carefully.

7) In a blender/liquidizer/food processor, combine half the sauce with the drained cauliflower, all the cheese, and one egg. Blend until smooth. Pour into the lined loaf pan and smooth out until even.

8) In the blender again, combine the peas, mint, the other egg and the other half of the sauce. Blend until smooth. Pour over the cauliflower mixture and smooth out the top.
9) Bake at 180 C for at least an hour, until firm. Allow to cool in tin before turning out. Serve cold.

- Pam